Giraffe3D Help File
![]() Gemstone
Tools
Gemstone
Tools
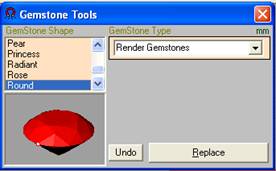
Gemstone tools contain a library of fifteen different gemstone shapes to be used for modeling and rendering. Gemstone tools include basic gemstones, render gemstones, and diamond render planes.
· Basic Gemstones
The basic gemstones are used for building the model. The simplicity of their shape allows them to be used for layout, cutting seats and chamfers for stone setting, and conserving memory for faster modeling. To learn how to use the basic gemstones read the following steps.
1. Select a gemstone shape from the list. In this case it is a round stone.
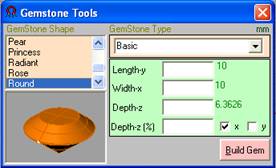
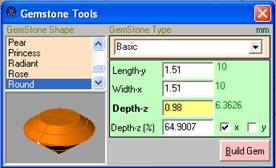
2. Enter the length (y-axis), width (x-axis), and depth (z-axis) of the desired gemstone size. Note that gemstone depth can be entered as a measurement or as a percentage of the gemstone length or width. If the check is in the box near the X the depth percentage will be of the width and if the box near the Y is check it will be of the length.
3. Click the Build Gem button to create the stone to the desired size.
Important note: Basic Gemstones include a gemstone stone model and a reference line and point. These elements are grouped. Do not ungroup and/or edit/delete the reference line and point included with the stone model. Doing so will result in improper functioning of other gemstone tools like render gemstone replacement and diamond render planes.
· Render Gemstones
Render Gemstones are used for creating product renderings from models created with basic gemstones. The Render Gemstone tool will replace the basic gemstones with facted gemstones for photorealistic renderings. To learn how to use Render Gemstones follow the steps below.
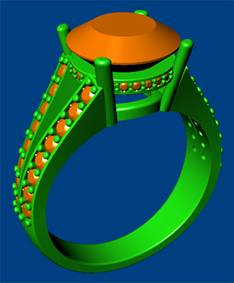
1. At this point the model has been built with basic gemstones as in the picture below and you are ready to render.
2. Select Render Gemstones from the drop down menu.
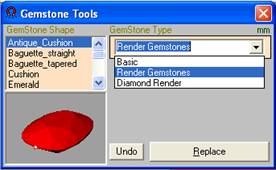
3. Select the desired gemstone shape and then click the replace button.
4. Then select the basic gemstones that you want to replace with the selected faceted gemstone shape. Press enter when done.
5. All basic gemstones will be hidden (use show command to bring them back after rendering). Faceted gemstones will be put in the basic gemstones’ place automatically.
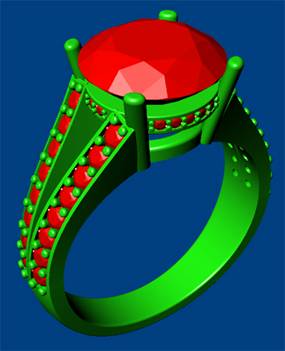
Important note: Render Gemstones include a gemstone stone model and a reference line and point. These elements are grouped. Do not ungroup and/or edit/delete the reference line and point included with the stone model. Doing so will result in improper functioning of other gemstone tools like diamond render planes.
· Diamond Render Planes
Diamond render planes insert a plane with an image of a diamond on it in order to create photorealistic diamonds. Colored stones do not require diamond planes, only diamonds do because there is currently no means of creating a render material that looks like diamond. Follow the steps below to learn how to user diamond render planes.
1. Select render planes from the drop down box.
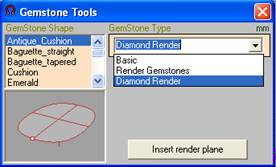
2. Select the gemstone shape from the list and click the insert render plane button.
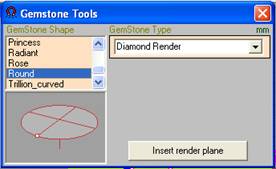
3. Select the gemstones that you want to render as diamonds and press enter.
Note: Gemstones that are to be rendered as diamonds will also need diamond render material applied to the render gemstone. Read on to learn how to apply render materials.
![]() Render
Materials
Render
Materials
Render Materials add a library of jewelry related metal and gemstone render materials to the Flamingo material libraries. Follow the steps below to learn how to apply render materials to objects.
1. Once you have replaced the basic gemstones with render gemstones and inserted render planes in any render stones that you want to look like diamond you are ready to apply materials.
2. Select the object(s) you want to put a particular material on.
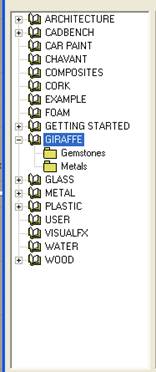
3. Click the render materials button to open object properties. Then select material from the drop down. Make sure the Plug-in radio button is check and click browse.
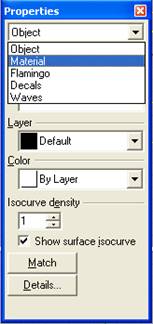
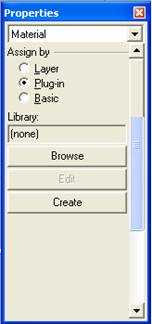
4. Select Giraffe3D material library, gemstone and metal materials are in separate folders.
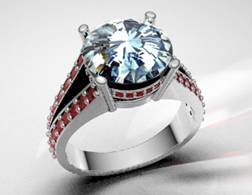
5. Select the desired material and click okay. Your material is now applied. Apply the rest of your materials and set up lights, rendering parameters, and ground plane. Now render.
Finished Rendering
![]() Ring
Sizes
Ring
Sizes
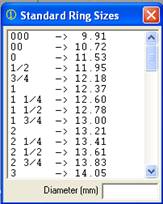
The ring sizes tool allows the user to quickly and easily create a circle with a diameter of the selected ring size. American standard ring sizes are on left and their corresponding diameters are on the right. Double click on the desired ring size to create the ring size circle. Sizes included are from 000 through 15.
![]() Cross section Editor
Cross section Editor
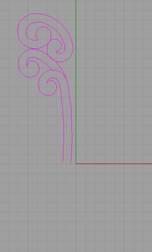
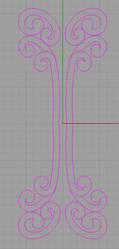
The cross section editor allows for easy modification/redrawing of cross section which are non-planar to a view port. Read on to learn how to use the editor.
1. Select a non planar cross section curve.

2. Left click the Cross section editor button and the current viewport and cplane will orient planar to the cross section.
3. Edit or redraw your cross section.

4. Once finished editing right click the cross section editor button and select the desired viewport and the viewport and cplane will be returned to its origin.
![]()
5. Create the new surface from the edited cross section(s)
![]() Scale by Dimension/Percentage
Scale by Dimension/Percentage
This command rescales an object(s) to desired dimensions or by percentage. The use can define the scaling origin.
1. Click the Scale by Dimension/Percentage button and the dialog opens. Once an object(s) is selected the maximum x,y,z values will appear in the left hand rows.
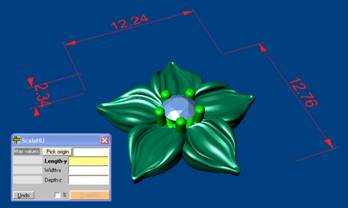
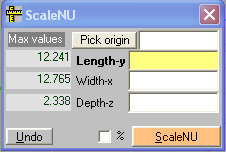
2. The user can then type in the scaling origin or click pick point button to select a point object to define the scaling origin (such as the volume centroid of the object(s)).
3. Then enter the desired dimensions in the right hand rows or check the percentage box and type in the percentage (ie to scale a particular dimesion down 2% type -2 in the desired axis dimesion box.)
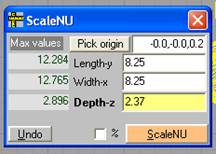
4. Once the parameters are set click scaleNU button and the object will scale to the new desired parameters.
![]() Quadrant Mirror
Quadrant Mirror
Quadrant mirror will mirror an object(s) over the X and Y axis. This command is viewport dependant. Objects must be selected before clicking the Quadrant mirror button.
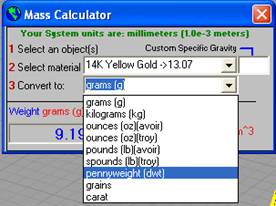
![]() Mass Calculator
Mass Calculator
The mass calculator will calculator the mass of a valid closed surface or polysurface.
- Click the Mass Calculator button and the dialog opens. Select one or more closed surfaces or polysurfaces.
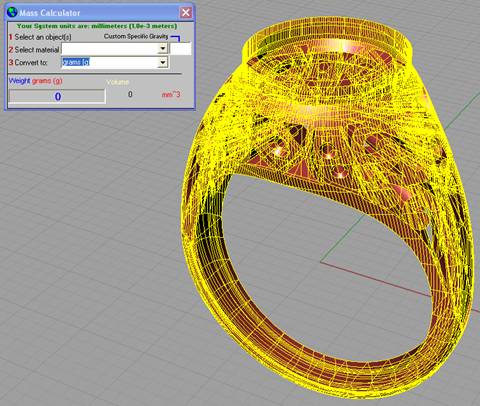
- Then select a material from the drop down or type a specific gravity into the custom specific gravity box. Important: Wait for the weight and volume numbers to appear in the dialog.
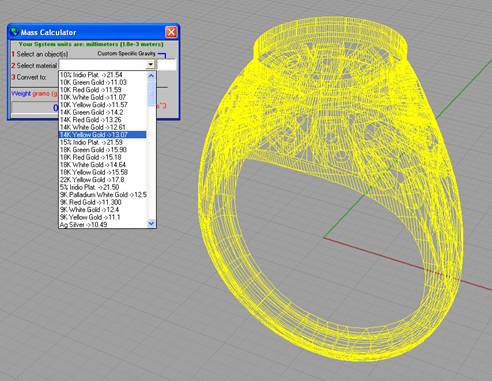
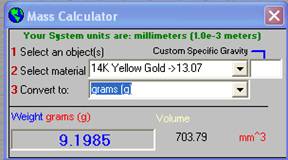
- Then select the units you want the weight and the program will convert the units.
|
C++/VB/CAD/CAM/Rhino3D/FOXPRO/SQL/SOLIDWORKS programming & 3D Solid Design If you'd like to contact me, I am available through my e-mail address. Therefore, if you are interested in anything above, just drop me an email for a job you need to be done: e-mail:  |